Hey, I am glad to see you on our third PrestaShop lesson! Today we are going to fill in your store information. Also I will show you how to add the products and manage the catalog. Let’s go!
Step 1: Store information
Open the PrestaShop admin panel, go to Shop Parameters > Contact and open the tab Stores. At first you’ll see the list of stores in Stores section. Here you can enable/disable, add/delete or edit each store. To edit the info on one particular store, choose the store you want to edit in Store Contacts and click ‘Edit’.
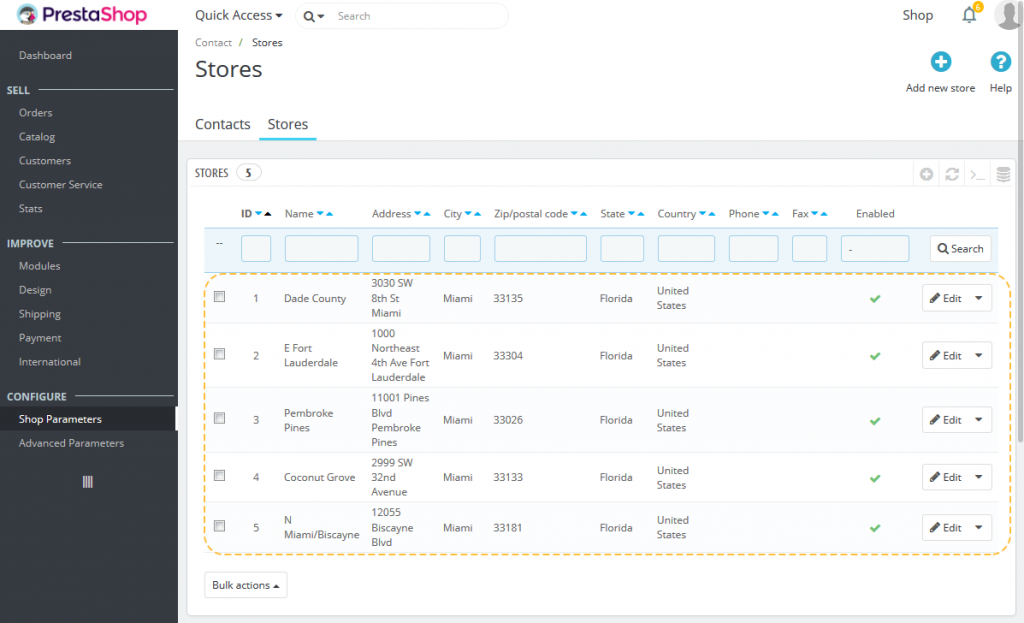
In Contact Details block you can change the main info about your store – its name and other contact details. Don’t forget to press the ‘Save’ button after editing.
Step 2: Adding the products
Let’s proceed to the main part of any store – products. Go to Catalog -> Products and click the button ‘+ New Product’. In the next window you should add information about it: upload photos, write a description and put the price. Also I recommend you to add the features, by which further you can group the products in the catalog.
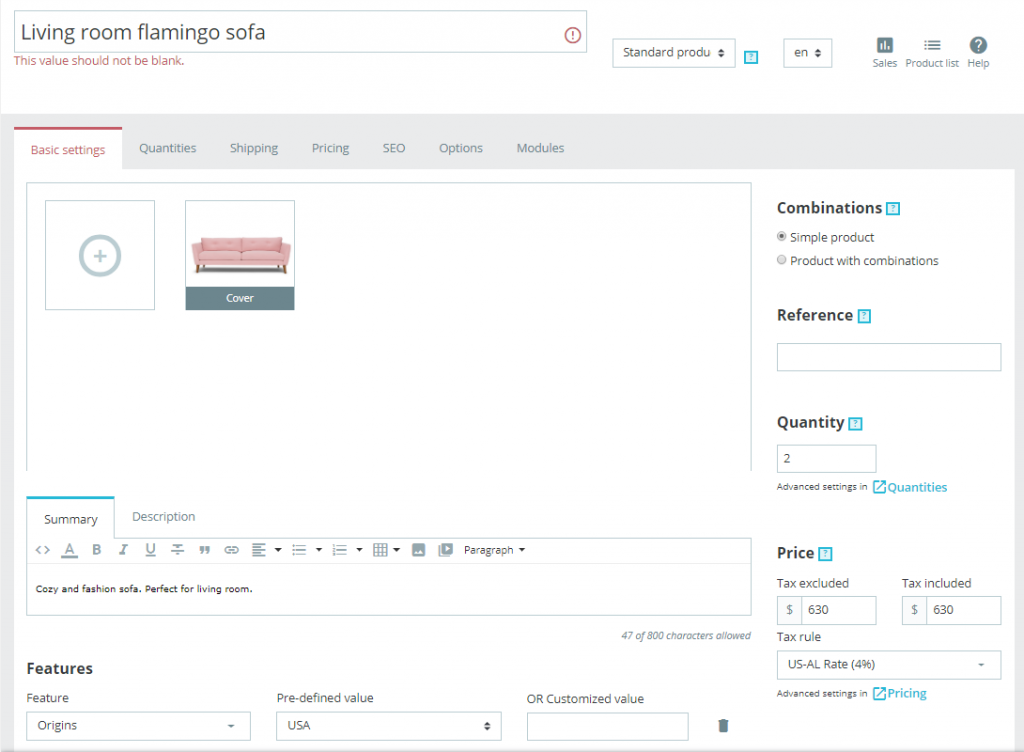
In the top tabs add information about quantity, options for customers when the item is out of stock, shipping methods and fees, prices and taxes. Don’t forget to put delivery fees at once – quite often people quit making an order on the last step because of unexpected additional costs. Another important measure is to set up SEO by adding meta titles and descriptions.
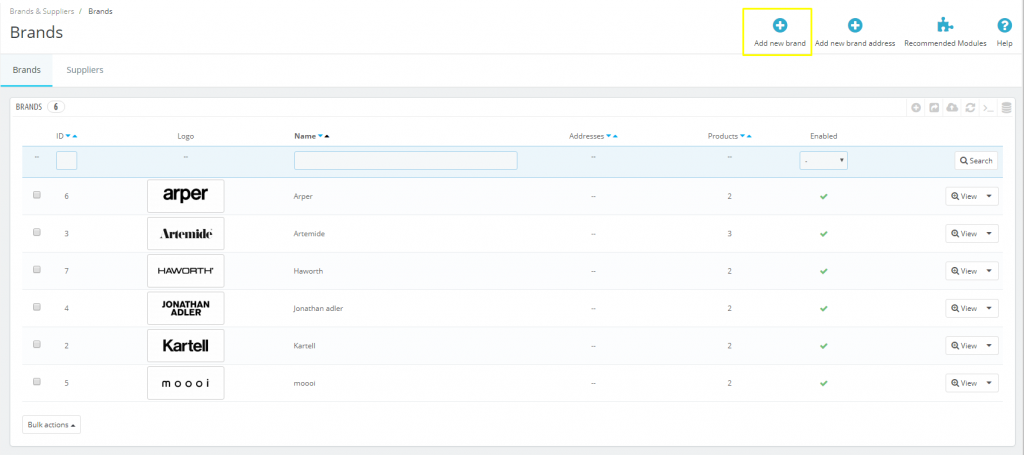
Here is a page to add information about brands and suppliers you work with. People trust established brands, so they won’t doubt in quality of products you sell. In terms of navigation, site’s visitors will have an access to all brands’ products. Moreover, adding information about brands will improve your rankings in search engines.
Remember that catalog is the heart of your shop, so you should fill all the characteristics of each product properly. Take your time to create a stunning catalog, pay attention to every detail.
Step 3: Stock management
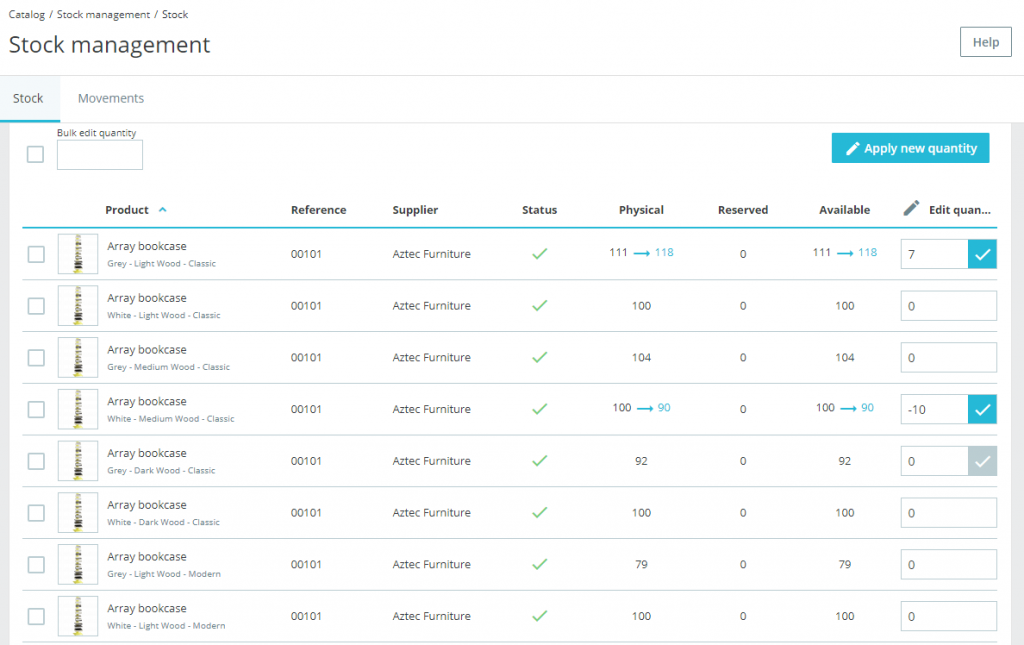
Like in any regular store there are stocks in online ones as well. Here you can track supplies, reservations and availability of the products. With this tool you will control all the movements and never lack any item. Changes can be applied both automatically (when customers make orders) and manually. For example, you had an arrival of 10 dining room chairs, so you simply add new quantity yourself. Inventory control has never been so easy!
Step 4: Setting up the discounts
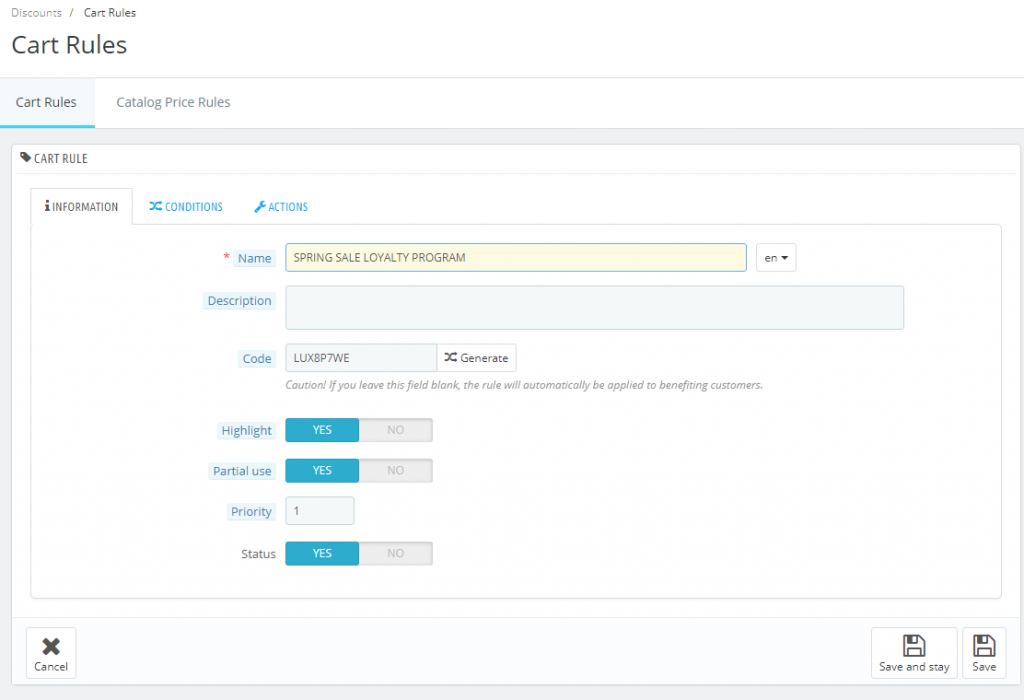
A store without a single sale – impossible! PrestaShop admin panel offers a tool, with the help of which you can set up discounts of different types. If you go to Catalog -> Discounts, you will see two options: Cart Rules and Catalog Price Rules. With the first you can create very precise discounts. For example, you want to give a discount for the next purchase for your clients, which you will include in newsletter. Click ‘Add New Cart Rule’, generate a promo code and set up conditions.
It’s up to you how to apply discounts in your store. You can allow the customer to use only a part of the discount, make it work with a selection of products, categories, brands, suppliers, attributes or all of these at the same time. You can set conditions for such benefits as free delivery or gifts as well.
The ‘Catalog price rules’ function allows you to set up price reductions by category, brand, supplier, attribute or feature. Note that the discount cannot be applied for a single product. You can review, edit or delete the currently existing rules just by clicking on it. If you need to disable a rule, simply change its end date to the day before.

Step 5: JX Products Manager
JX Products Manager is a custom premium module, which is already included in Nextprest. If you work on different template, you can install it separately. With its help you can apply different operations to your products much easier, for example, filter the items.
The main module menu is divided into two parts: ‘Choose section’ and ‘Choose option’. The first one is showed in the form of tabs. Click each tab to see the available options in this section:
- Information – product availability and description.
- Price – price and tax rules settings.
- Associations – ability to change brand, category or accessories of several products. Quantity – changing products’ quantity.
- Extra Pages – ability to add a new page.
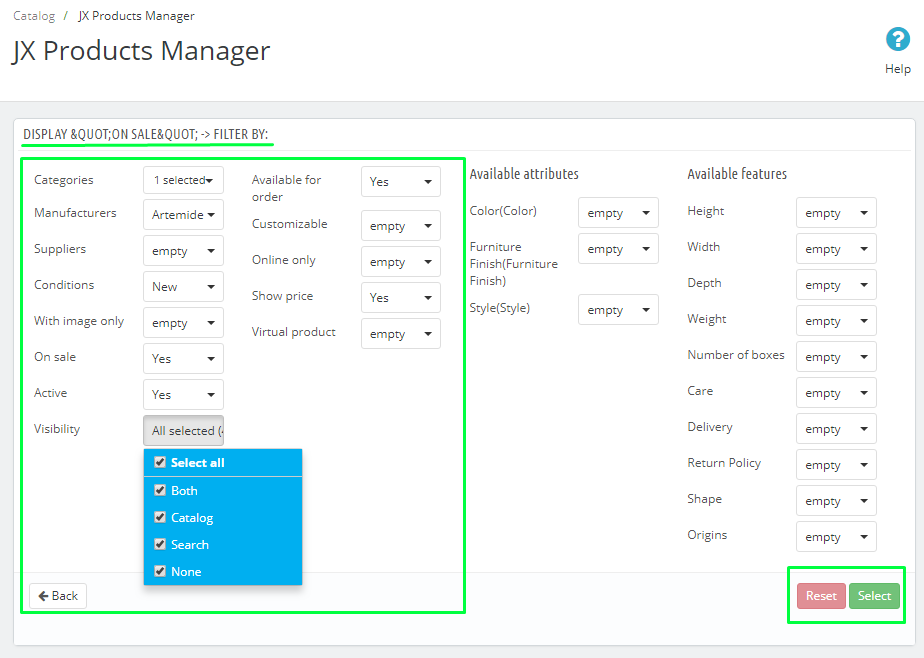
Choose an option to set necessary filtering conditions. For instance, I am about to tag products that are on sale. I click on ‘Price’ section, choose Display ‘On Sale’ option and put filters in the next window.
So, let’s make a break. The lesson is highly informative, you should spend a lot of time on customizing your catalog. See you!