Hi and welcome to the 4th lesson of our PrestaShop School 😉
Today we will install shipping and learn how to manage the orders and work with clients.
Step 1: Shipping
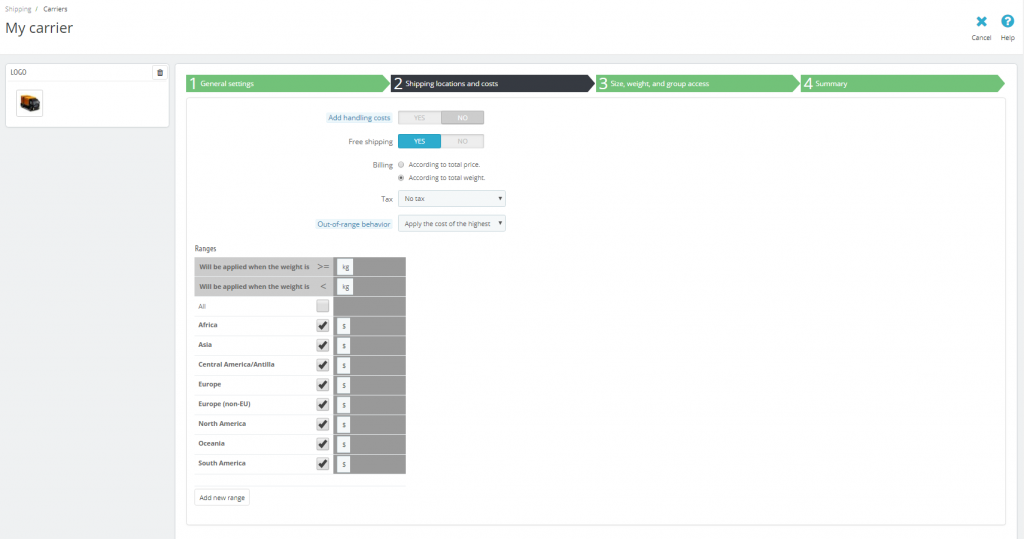
Any online store must provide customers with shipping – free or paid. You can cooperate with different shipping services or offer your own. In order to manage that go to Shipping -> My carriers to add information about the service: general settings, conditions, costs, locations and sizes. Set up conditions for free shipping in terms of minimum order weight or cost in tab ‘Preferences’.
Step 2: Orders
In order to manage general order settings go to ‘Shop Parameters’. Here you can manage such functions as:
- Final summary – some European countries require detailed summary of the order before submitting;
- Guest checkout – switch on, if you want to allow unauthorized clients to make orders;
- Minimum purchase total required in order to validate order – some shops require established amount to submit an order, otherwise put 0;
- Recalculate shipping costs after order edition – if enable, the shipping costs will be recalculated when a customer has edited an order, e.g. added a product, changed a delivery address or service, etc.;
- Terms of service – usually all customers should accept the terms of service of your store before submitting an order.
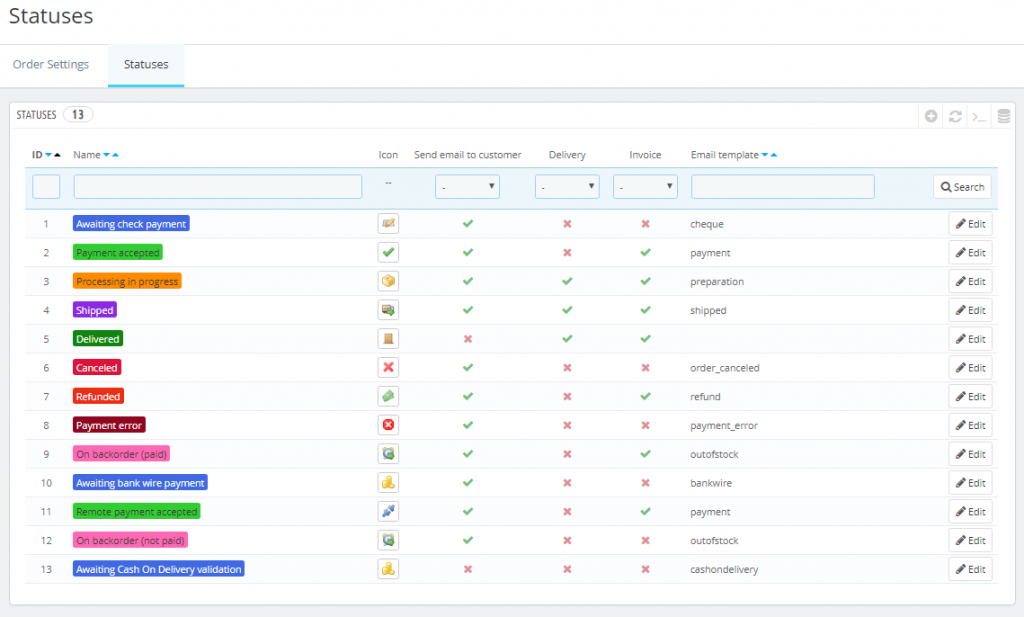
Below on the page you can manage some extra options for your customers as gift wrapping or recycled packaging. On the next tab you can see order statuses, which are labeled with different colors. This makes managing orders and returns easier and also helps you to keep the customers informed about their order statuses.
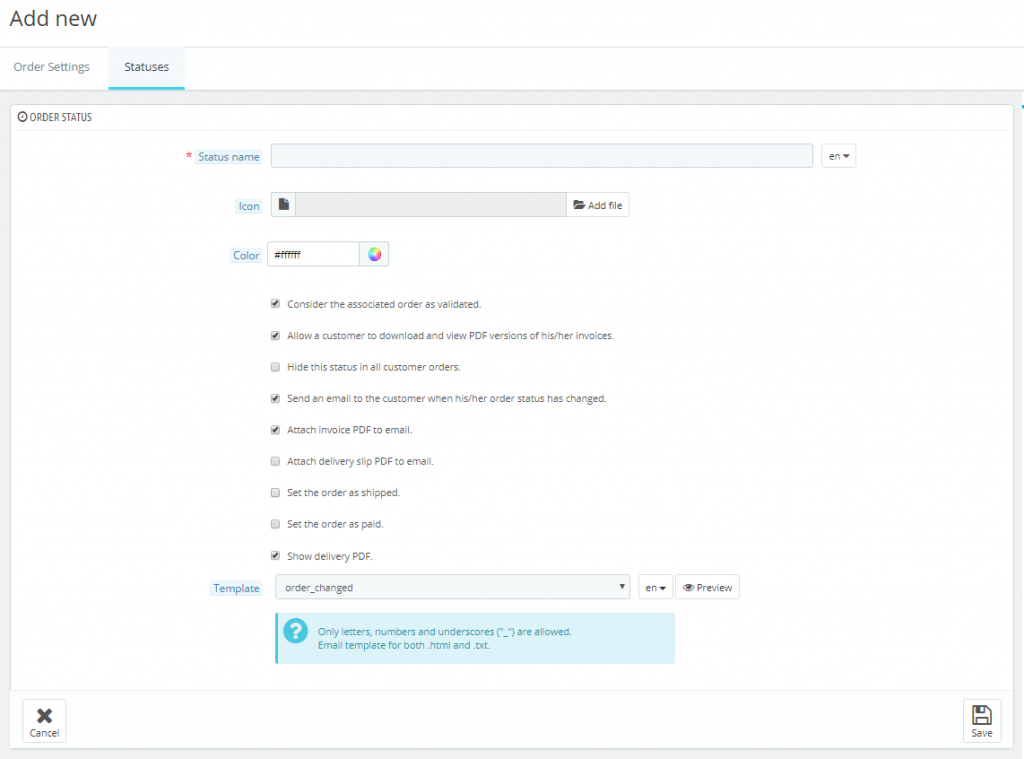
In order to create a new status (if needed) click ‘Add new order status’ button at the top and fill the following form:
- Status name
- Icon
- Color (try to match it to the existing colors with default meaning):
- Red/Orange: canceled or refunded orders;
- Crimson red: payment error;
- Blue: orders which are still awaiting payment;
- Light green: paid orders;
- Dark green: delivered orders;
- Purple: shipped orders;
- Pink: back ordered orders.
Then enable necessary options:
- ‘Consider the associated order as validated’ marks all associated orders as “paid”.
- ‘Allow a customer to download and view PDF versions of their invoice’. Enable this, otherwise you will have to send customers their invoices manually.
- ‘Hide this state in all customer orders’. This is an option for internal statuses, which are visible only for you and your team.
- ‘Send an email to customer when his/her order status has changed’. Enable this function and choose an appropriate email template from drop-down menu.
- ‘Attach invoice PDF to email’.
- ‘Attach delivery slip PDF to email’.
- ‘Set the order as shipped’. Note: once an order is set as “shipped”, it cannot be set back to the previous status. ‘
- Set the order as paid’. Same here: once an order is set as “paid”, it cannot be set back to the previous status.
- ‘Show delivery PDF’.
Step 3: Customers
There are 3 main groups of customers in PrestaShop: visitor, guest and customer. This classification helps you to offer different benefits for certain groups. They can be edited at ‘Shop Parameters -> Customer Settings -> Groups’. For example, you can disable some functions for unauthorized guests, such as ability to create wishlists, compare products, make orders in one click, etc. Just switch sliders where needed as shown below.
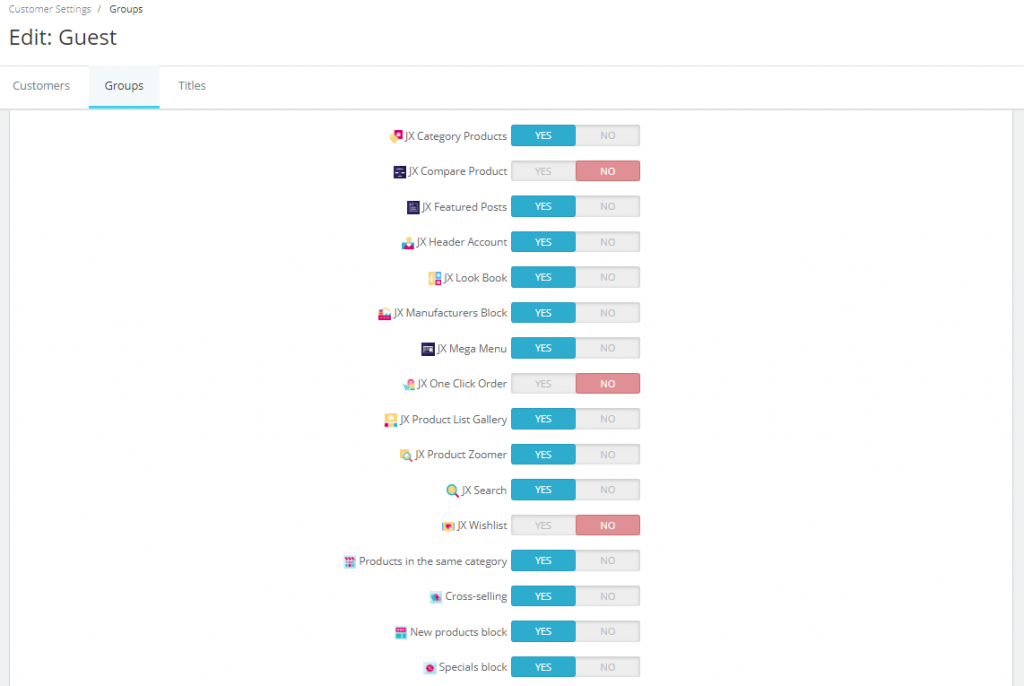
Remember that you can turn on/off guests’ ability to make orders in ‘Order Settings’ tab.
In General settings you can set up customer preferences as to redisplay processing cart at once as a customer logs back in, send email with account summary right away after the user is registered, ask for birthday date, for example, in order to send your customers small birthday gifts. You can also enable B2B mode – clients can be considered as companies and will be offered with a range of options, which are not available for regular customers.
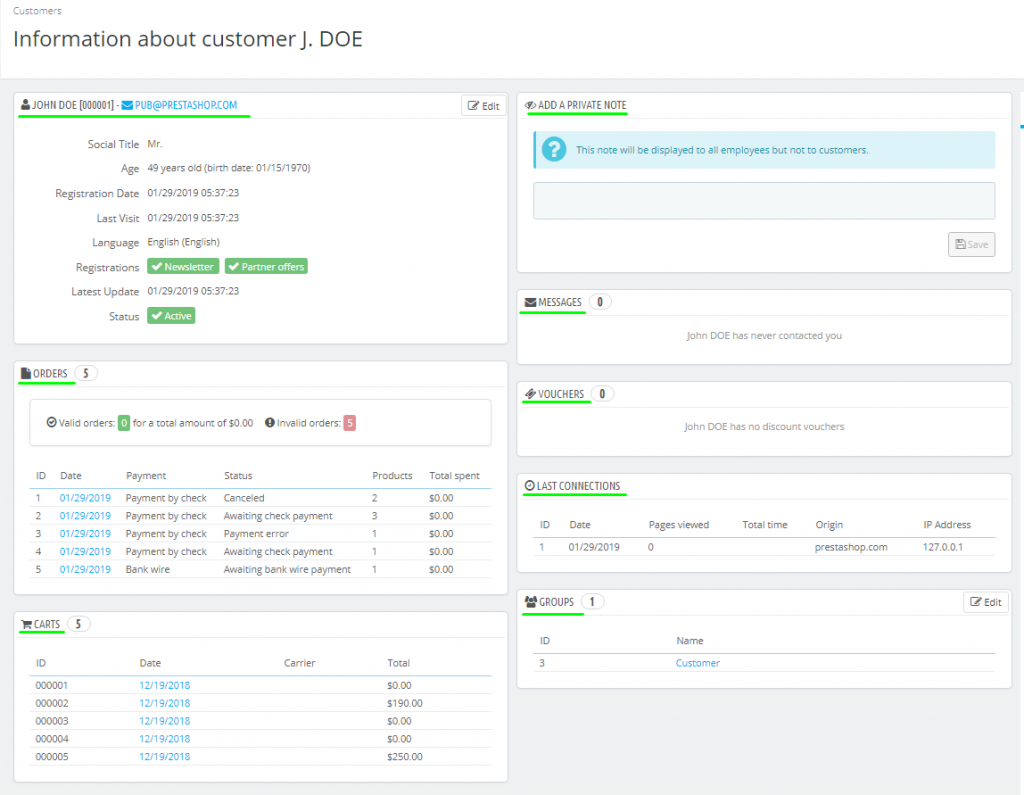
If you click ‘Customers’ at the left panel you will be redirected to the page with the list of your customers. There you will see such information as their names, if subscribed to newsletter, how many purchases were made and if currently active on the website. More key data can be viewed in each customer’s profile:
- Information regarding the subscription to the newsletter and ads from partnering companies.
- Notes from the store’s employees.
- Inquiries to store’s customer care service.
- Available discounts.
- Summary of the customer’s past orders: amount spent, type of payment, order status.
- Carts that the customer has created since sign-up.
- Summary of the products that were purchased by a customer. (This feature allows you to track customer’s preferences and maybe offer a discount in right time).
- A list of the products viewed by the customer. (If no order proceeds, you can help your client to complete it by sending him/her a call-to-action email).
- Registered addresses.
Step 4: Customer care service
Much success of any store depends on quality of customer care service. It must be on professional level. In PrestaShop admin panel you have all customer requests in one place. There you can track which of discussion threads need to be answered. So if customer has a question, he/she leaves it in contact form in the footer. The message will be dropped to customer care service tool in admin panel.
Note: the function ‘Save messages?’ in ‘Shop Parameters -> Contact’ must be enabled, otherwise you will get inquiries from customers only via email.
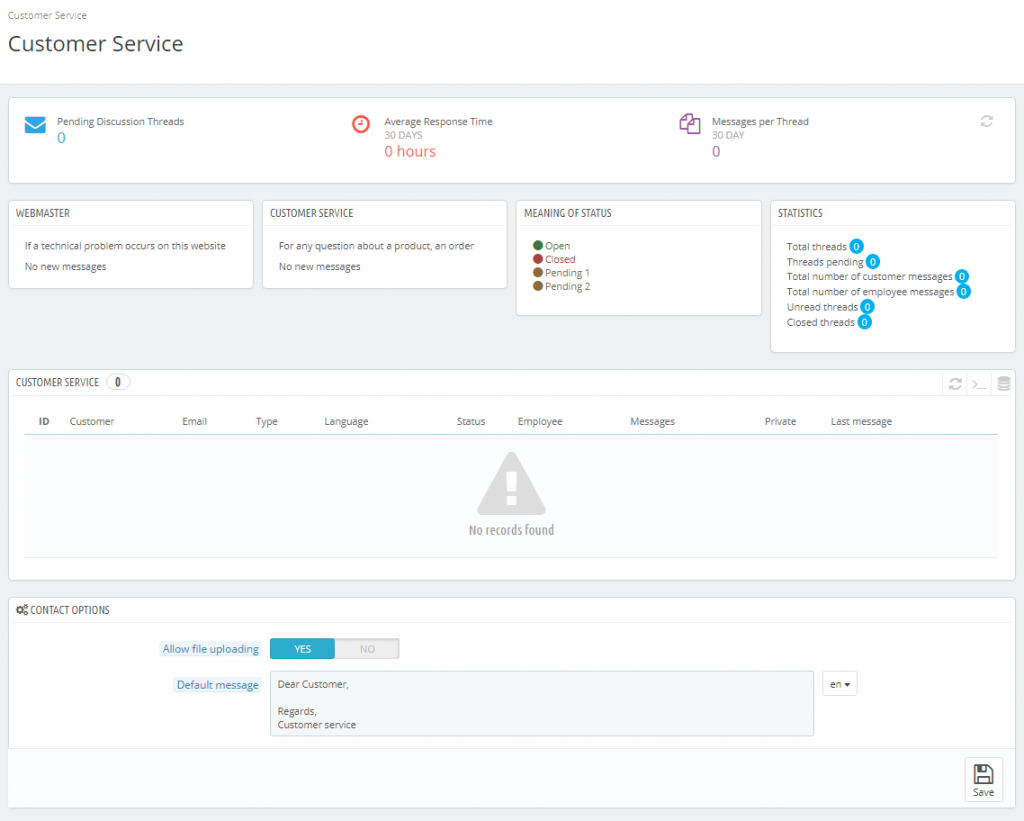
Customer service conversations can be handled in PrestaShop admin panel, there is no need in using email clients.
Open conversation details to apply the following actions in order to handle customer’s issues quicker:
- Mark as “handled” or “Re-open”.
- Mark as “pending 1” and Mark as “pending 2” (internal statuses for your team).
- Forward this discussion to another employee.
- Reply to the next unanswered message in this thread.
Click ‘Orders and messages timeline’ in order to view clear chronological view of the discussion thread.
Well, now you know almost everything about setting up a PrestaShop online store. We are approaching the final lesson in which you will learn what essential modules you should have in the website to make it work perfectly.